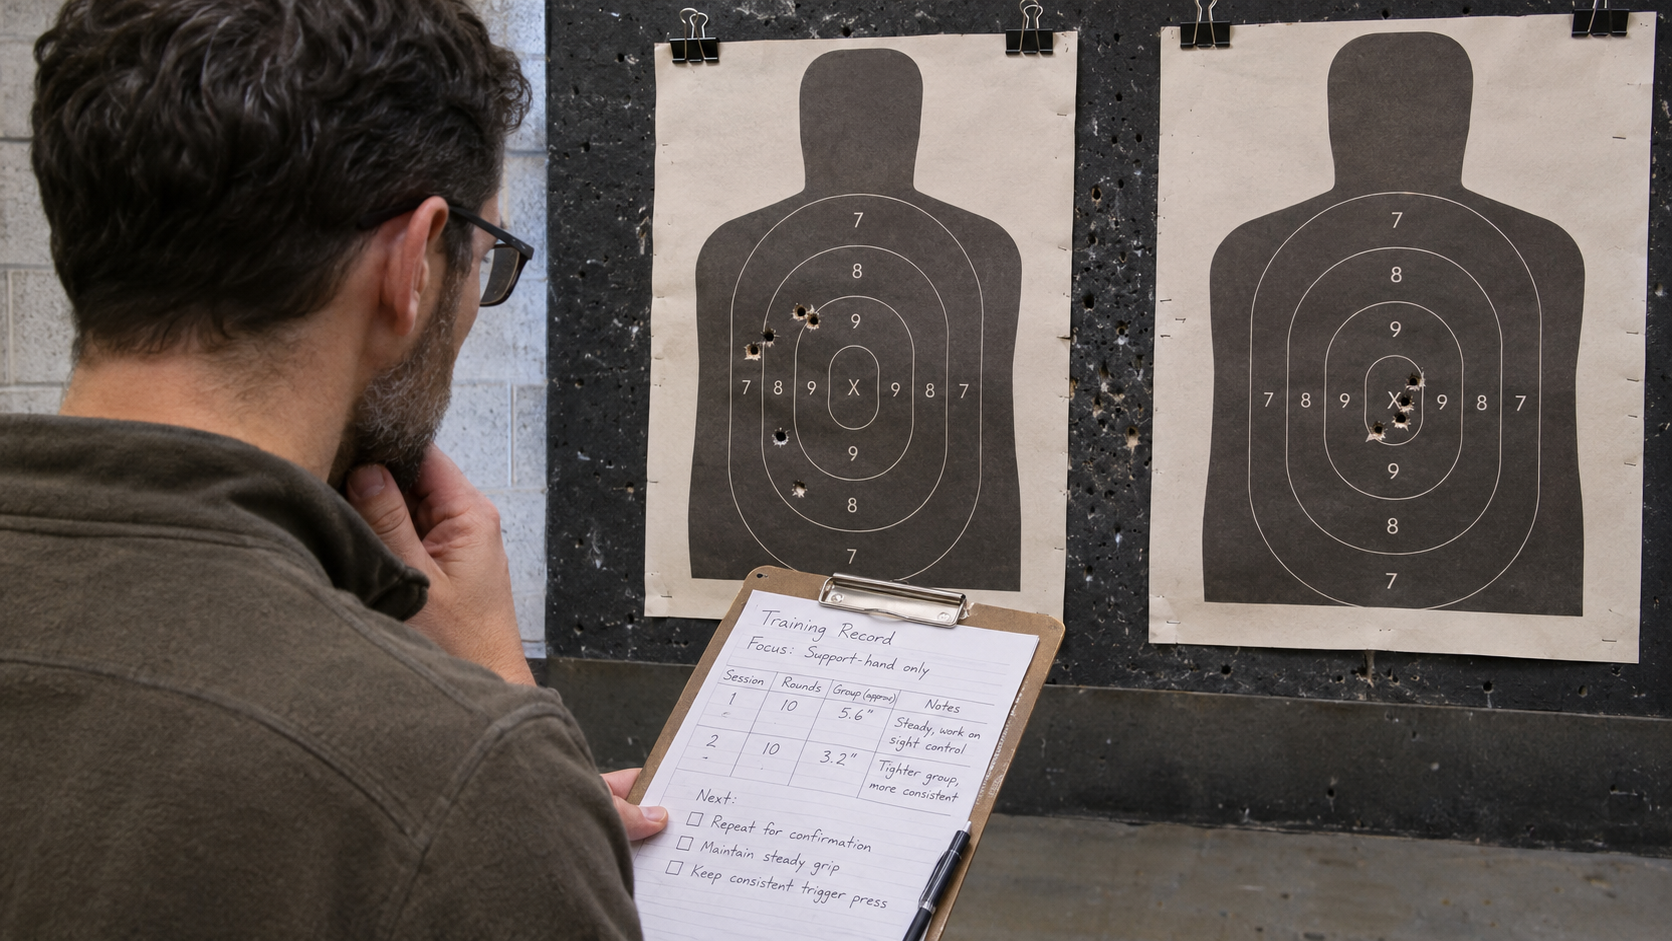
Most shooters spend nearly all their practice time using the same hand. That makes sense: it is the hand they already trust. But shooting with the other hand is a distinct skill, and it can reveal weaknesses that two-handed practice may hide.
Support-hand practice is not simply a matter of taking one hand off the firearm and expecting the same result. Your grip changes. The trigger may feel different. Your sight picture may wander more. You may find it harder to control the firearm or repeat the same shot process.
Those are useful things to learn in a controlled setting. This article explains what support-hand-only shooting involves and lays out a gradual, measurable range progression to discuss with a qualified instructor. It does not teach a holster draw, a handoff, or what to do in a real-world confrontation. The drills use a stationary target and a range-approved starting position.
The purpose is straightforward: build safe, repeatable fundamentals with your less-practiced hand. Start slowly, record what happens, and let an instructor help you decide when to add difficulty.
What Do We Mean by “Support Hand”?
For most shooters, the support hand is the hand they do not normally use as their primary shooting hand. If you usually shoot right-handed, your left hand may be your support hand. If you shoot left-handed, it may be your right.
That description is a starting point, not a rule about which hand you should use. Some people write with one hand but perform other tasks more comfortably with the other. Some have an injury or limitation that affects their preferred hand. The useful question is not what label fits you. It is which hand you currently rely on when you shoot, and how familiar you are with shooting using the other.
The skill covered here is support-hand-only shooting: firing with one hand, using the hand that is not normally your primary shooting hand. It is different from two-handed shooting, where both hands help hold and control the firearm. It is also different from transferring a firearm from one hand to another. This article covers the former, not the latter.
That distinction matters for both training and safety. A student should not improvise live-fire handoffs or firearm manipulations. If a class covers those skills, the instructor should explain the purpose, equipment, and safety process before the exercise begins.
For this article, the progression is limited to stationary practice on a paper target, under qualified supervision, from a starting position approved by the range. The article does not set a standard for what someone should do in an emergency or predict how they would perform under stress.
Why Practice With Your Less-Familiar Hand?
Support-hand practice can show you how well you understand the fundamentals when your usual habits change. A two-handed grip may help you manage the firearm in ways that are less available when only one hand is involved. When you remove that familiar support, you may notice that the sights move more as you operate the trigger, that your grip feels less stable, or that your results are harder to repeat.
That information can help guide future instruction. It may reveal that you need more time with the basic fundamentals, that your grip needs attention, or that the firearm is difficult for you to control in that hand. The point is to identify the issue, not to force a quick correction.
There are also practical reasons to understand the skill. A person may have an injury, a mobility limitation, or another physical constraint that affects one hand. That does not mean a reader should simulate an injury with a loaded firearm. It means an instructor can help the student understand the skill and its limits in a controlled setting.
Support-hand practice should not become a test of toughness. It is not a contest to see who can shoot fastest with the less-familiar hand. It is a way to examine a skill that many shooters rarely train and to improve it at a pace that preserves control.
A good outcome might be modest: tighter groups than last month, more consistent results across several strings, or a clearer understanding of what the hand can currently manage. Progress does not require matching dominant-hand performance.
What the Skill Actually Tests
Support-hand-only shooting brings several basic skills into sharper focus. NRA pistol-marksmanship instruction includes fundamentals such as grip, sight alignment, and trigger control; these are also relevant when a shooter practices with the support hand.
Grip and control
The support hand may not hold the firearm as naturally as the dominant hand. The student may feel less control, fatigue sooner, or need more time to establish a repeatable hold.
The article should not prescribe a universal grip adjustment. The instructor can observe the student’s hand size, the firearm, and the student’s control, then give specific feedback. A change that helps one person may not work for another.
Sight alignment and sight picture
The sights may appear less steady in the support hand. That can make it tempting to rush the shot or accept a sight picture the student would not accept with the dominant hand.
The practical task is to notice what the sights are doing and maintain a deliberate shot process. A student should not treat ordinary movement as failure. The goal is to learn what level of control they can currently repeat.
Trigger control
Operating the trigger with the less-practiced hand can feel awkward. The student may find it harder to move the trigger without disturbing the sights. That is a subject for instructor feedback, not a reason to force the finger into an uncomfortable position or rush through repetitions.
Recoil and follow-through
The student may find it harder to maintain a consistent sight picture after each shot. Give yourself time to observe what happens. The next repetition should not begin before you have regained control and followed the instructor’s directions.
Safe handling and attention
A more demanding skill can draw attention away from basic safety. The student must continue to follow range commands and maintain control of muzzle direction and trigger discipline. NSSF safety guidance emphasizes those responsibilities whenever a firearm is handled.
If the student cannot stay focused on those requirements, the drill is too complex for the moment. Pause and return to a simpler stage with the instructor.
Before the First Live-Fire Repetition
Support-hand shooting should begin with preparation, not improvisation. If you are new to firearms, unsure how your firearm operates, or uncomfortable following range procedures, start with basic instruction before attempting this exercise.
Talk to the instructor first
Tell the instructor what you want to work on. A simple request is enough:
“I’d like to build support-hand-only fundamentals. Can we start with a safe, stationary drill?”
Ask what equipment to bring, which firearm is appropriate, and how the range handles the exercise. Let the instructor choose the target, distance, starting position, and first-stage drill based on your experience and the facility’s rules.
The instructor should explain the safety procedures before live fire begins. You should know what commands to follow, where to point the firearm, how to stop the exercise, and when the instructor wants you to look at the target.
Keep the first session simple
The first session should avoid extra variables. Do not add:
- A holster draw.
- Movement.
- A timer.
- Target transitions.
- Firearm handoffs.
- A simulated injury.
- Unfamiliar equipment or a new firearm.
A stationary target and a basic starting position give the instructor a clearer view of the skill. They also make it easier to understand what changed if the student’s results differ from dominant-hand practice.
Use the firearm you know
The article should encourage students to use a firearm they already understand, if the instructor agrees it is suitable. Changing to a different firearm at the same time as changing hands makes the result harder to interpret.
If the firearm’s grip or controls do not fit the student’s hand well, raise that with the instructor. Do not try to solve fit problems by forcing an awkward position. Firearms differ, and NSSF advises shooters to understand the handling characteristics of the specific firearm they use.
Agree on a clear stop condition
Before the drill, agree with the instructor on when to pause. For example, pause if the student loses the ability to maintain the required safe direction, becomes confused by a command, or cannot control the exercise. The instructor may set additional conditions.
Stopping is part of training. It gives the student and instructor a chance to reset before a small problem becomes a safety problem.
The Main Drill: Establish a Support-Hand Baseline
The baseline drill answers a basic question: what can you do now, under controlled conditions, with the support hand?
Set up the record
Use a simple scorecard. The instructor chooses the target and distance. Record the details so you can repeat the same exercise later.
| Session | Target and distance | Repetitions | Hits in chosen area | Notes |
| 1 | ||||
| 2 | ||||
| 3 |
The scorecard is not a qualification standard. It is a way to track your own progress under similar conditions.
Start with one deliberate shot
Under the instructor’s direction, begin with one shot using the support hand. Use a pace that allows you to follow the instructor’s instructions and maintain control. Do not use a timer.
After the shot, follow the range’s procedures. The instructor can help you review the result and explain what to notice. Avoid deciding that you need a different grip or technique based on one shot.
Repeat a few single shots, with pauses between them. The instructor should determine the number of repetitions and whether you are ready to continue.
Record observations
After each repetition, write down or discuss:
- Did the shot land within the chosen scoring area?
- Did the sights remain sufficiently controlled for the exercise?
- Did the firearm feel stable?
- Did the trigger operation feel awkward?
- Did you follow all range commands without confusion?
- What did the instructor notice?
Keep the notes factual. “My group spread more than I expected” is useful. “I’m hopeless with this hand” is not a training diagnosis.
The baseline is successful if it gives you an honest picture of your starting point. You do not need to be fast, and you do not need to match the performance of your dominant hand.
Build the Skill in Stages
The progression below is an outline for a supervised session. It is not a substitute for an instructor’s judgment. The instructor should decide whether each stage is appropriate and whether the student should repeat, pause, or step back.
Stage One: Single shots
Begin with individual shots. The student has time to prepare, follow the instructor’s commands, and review each result. This stage is about safe control and understanding what the support hand can currently do.
Stay at this stage if:
- The student is uncertain about the range commands.
- The firearm is difficult to control.
- The instructor sees a safety concern.
- The student cannot repeat the same process.
- The results are too inconsistent to evaluate.
There is no penalty for spending a full session on single shots. If the student needs time to understand the fundamentals, that is the work.
Stage Two: Short strings
When the instructor believes the student is ready, move to a short string of two or three shots. Keep the same target, distance, and starting position. Do not add a timer.
The student focuses on maintaining control between shots and following the instructor’s process. The instructor can observe whether the student’s grip or sight control changes after the first shot.
Review the target after each string according to the range procedures. Record the result. If the group becomes less consistent, return to single shots or ask the instructor for feedback.
Stage Three: Repeat the same string
Once short strings are manageable, repeat them at the same pace. The goal is not to improve every variable at once. It is to see whether the student can reproduce a similar result several times.
A reasonable session might include a few short strings, with rest and review between them. The instructor determines the exact number. Fatigue matters: if the student’s hand becomes tired or attention drifts, stop the exercise.
The student should record every string, not just the best one. One good result is encouraging, but repeatability is a better measure of skill.
Stage Four: Change one variable
Only after the student can repeat the current exercise should the instructor consider adding a challenge. Change one variable at a time. Depending on the student and the course, that might mean:
- A modest change in target distance.
- A smaller scoring area.
- A slightly longer string.
- A limited time component, if the range permits and the instructor approves.
Do not combine all of these changes. If distance, target size, string length, and time pressure all change together, it will be difficult to understand what caused the results to change.
The progression should pause if accuracy drops sharply, control becomes inconsistent, or safe handling deteriorates. Return to the last successful stage and work there.
The Support-Hand Progression Drill
This is a practical framework readers can bring to a qualified instructor. The instructor should adapt it to the student and the range.
- Select the setup together. The instructor chooses an appropriate stationary target, distance, and starting position.
- Confirm the standard. Decide what counts as a hit for this exercise before starting.
- Fire several single shots. Keep them untimed and review the results.
- Move to short strings only when approved. Use the same setup and keep the pace deliberate.
- Repeat the strings. Record all results and look for consistency.
- Change one variable only after repeatability. The instructor decides whether to increase distance, reduce the scoring area, or add another appropriate challenge.
- Return to the previous stage when performance breaks down. The goal is to build reliable control, not force a higher difficulty.
What counts as progress?
Progress may look like:
- More repetitions inside the chosen scoring area.
- Less variation between strings.
- Improved control without rushing.
- Better ability to describe what felt different.
- Safe, consistent behavior throughout the exercise.
Progress does not have to mean a faster time. A timer is not necessary for the early stages. Speed should come later, if the instructor considers it appropriate.
Common Problems and How to Handle Them
The student may notice several difficulties. The right response is to pause, record the issue, and ask the instructor—not to make several technique changes at once.
“My sights move more than they do with my dominant hand.”
That may be a useful observation. The instructor can watch the student and help determine whether the issue comes from grip, stance, trigger control, fatigue, or another factor. Avoid trying to force the sights perfectly still. Ask what level of movement is expected for the exercise and how to improve control.
“The trigger feels awkward.”
Do not contort the hand or force the finger into a position that feels unsafe. Explain the sensation to the instructor. The fit of the firearm and the student’s hand may affect comfort. The instructor can decide what adjustment, if any, is appropriate.
“My first shot is fine, but the group spreads.”
This may mean the skill changes as the student gets tired or tries to move too quickly. Reduce the string length or take a longer rest. Review the target and ask the instructor to observe the next repetition.
“I’m trying to fix everything at once.”
A student may focus on grip, sights, trigger, stance, and speed simultaneously. That can make it hard to learn. Pick one instructor-identified point for the next string. Afterward, discuss whether the change helped.
“I’m frustrated by the difference between hands.”
That difference is the reason for the exercise. Your support hand has less practice. A wider group or slower pace is not a verdict on your ability; it is a starting point. Keep the goal narrow: safe, consistent improvement.
Keep a Training Log
A short training log helps readers see progress that may be difficult to remember from one month to the next. It also prevents a single good string from becoming the entire story.
Record:
- Date and range.
- Firearm used.
- Target and distance.
- Drill stage.
- Number of repetitions.
- Hits within the selected scoring area.
- Instructor feedback.
- Questions to ask next time.
Use a table if helpful:
| Date | Drill stage | Repetitions meeting standard | What improved | What needs instructor feedback |
| Single shots | ||||
| Short strings | ||||
| Repeatability |
Compare sessions only when the conditions are similar. A result at one distance with a large target should not be directly compared to a result at a different distance with a smaller scoring area.
Avoid using the log as a self-ranking system. It is a record of what you practiced and what to work on next.
Practice Between Range Sessions
Firearm-specific practice should follow the instructor’s directions and the firearm manufacturer’s instructions. Do not improvise support-hand manipulation, live-fire exercises, or handoffs at home.
Between classes, readers can still prepare:
- Review the instructor’s notes.
- Write down questions that came up during practice.
- Check that the next class covers the skill they want to improve.
- Practice ordinary coordination with a harmless object, such as holding a flashlight or opening a door with the support hand.
These non-firearm activities do not replace range instruction. Their purpose is simply to make the less-used hand more familiar in everyday tasks.
If an instructor recommends dry practice, follow the exact safety procedure they provide. Do not assume that a procedure for one firearm applies to another. When in doubt, ask before practicing.
Choosing the Right Class
Not every class includes support-hand-only shooting. Ask about the course before registering.
Useful questions include:
- Does the class cover support-hand fundamentals?
- What experience level does it expect?
- How does the instructor introduce the skill?
- What target, equipment, and range procedures are used?
- Is there time for individual feedback?
- How does the instructor decide whether a student is ready to add difficulty?
- What should a student do if the exercise becomes uncomfortable or confusing?
A class should explain its safety procedures clearly and give students a way to pause and ask questions. NRA training programs include instructor-led pistol courses and marksmanship instruction; readers can use course descriptions to see whether a class’s stated content matches their goals.
You do not need to begin with an advanced course. A careful introduction to the skill is more valuable than an exercise that moves faster than you can learn.
Build the Skill, Not a Score
Support-hand-only shooting is worth practicing because it shows you what happens when you rely on a less-familiar hand. It may reveal differences in grip, sight control, trigger operation, or consistency. The goal is not to hide those differences. It is to understand them and improve them safely.
Start with single shots. Move to short strings only when your instructor approves. Record each repetition. Change one variable at a time. If your control or accuracy drops, return to the last stage where you could practice consistently.
The most useful question is not, “Can I do this as fast as I can with my dominant hand?” It is, “Can I perform this safely, repeat it, and explain what I need to improve next?”